

How To Make A DIY Pom Pom Wreath
I’m totally open about the fact that I’m not the most natural crafter. I don’t handle mess very well and I’ve always been slightly in awe of those mums who let their kids loose with the glitter and Pritt Stick (other glue brands are available) in the LIVING ROOM. Now, I’m not quite there yet, and I’m not sure I’ll ever reach those levels of relaxation to be honest, but I am definitely discovering the joys of crafting for the first time thanks to Hobbycraft. I loved making this Pom Pom wreath and I am definitely going to make them again.
When Hobbycraft approached me about collaborating with them, they asked me to come up with some ideas about what content I might like to create. As I was right in the thick of Nellie’s bedroom makeover, naturally I thought about making something for her room. Nellie loves a Pom Pom…on clothes, bags, shoes, bedding…anything really, she’s into it. So a Pom Pom wreath it was! It’s such a good craft if you’re a beginner, cheap, easy and actually really quite therapeutic to boot.
Here’s how I did it - (I’ve also recorded all this over on my IGTV which I will link at the bottom of this blogpost for you)
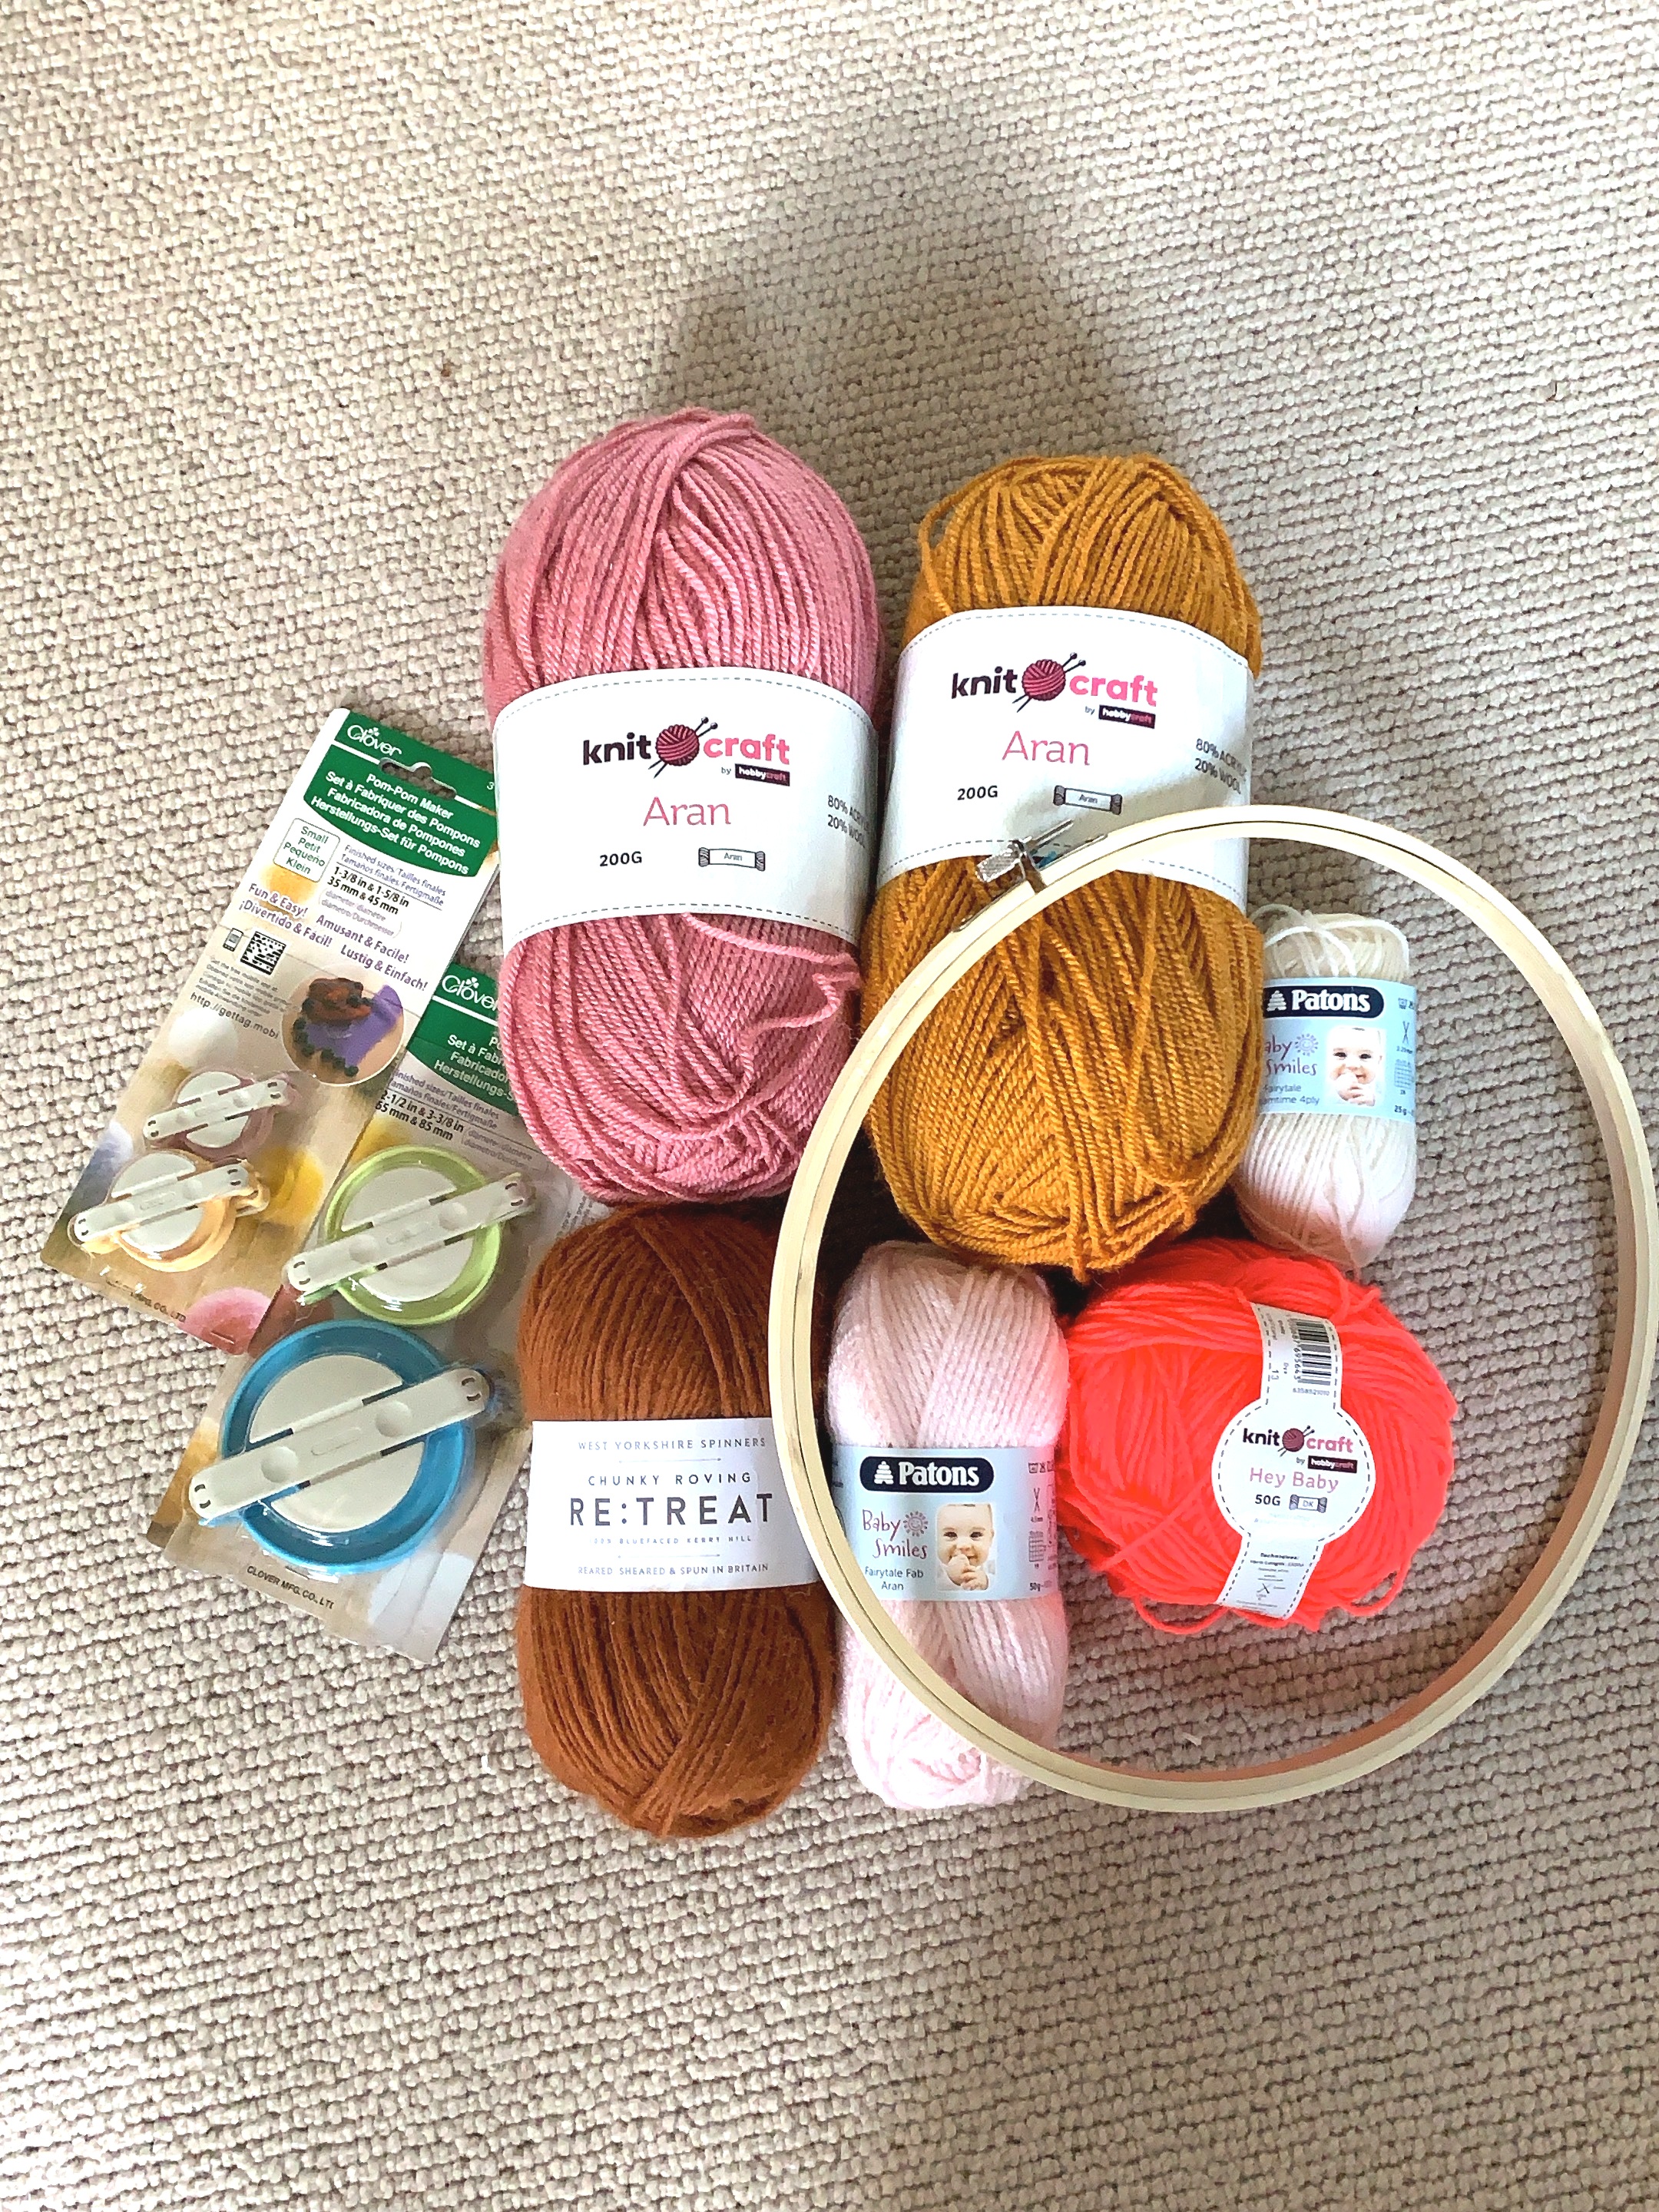
What you need
A selection of Yarn in your chosen colours
Scissors to trim
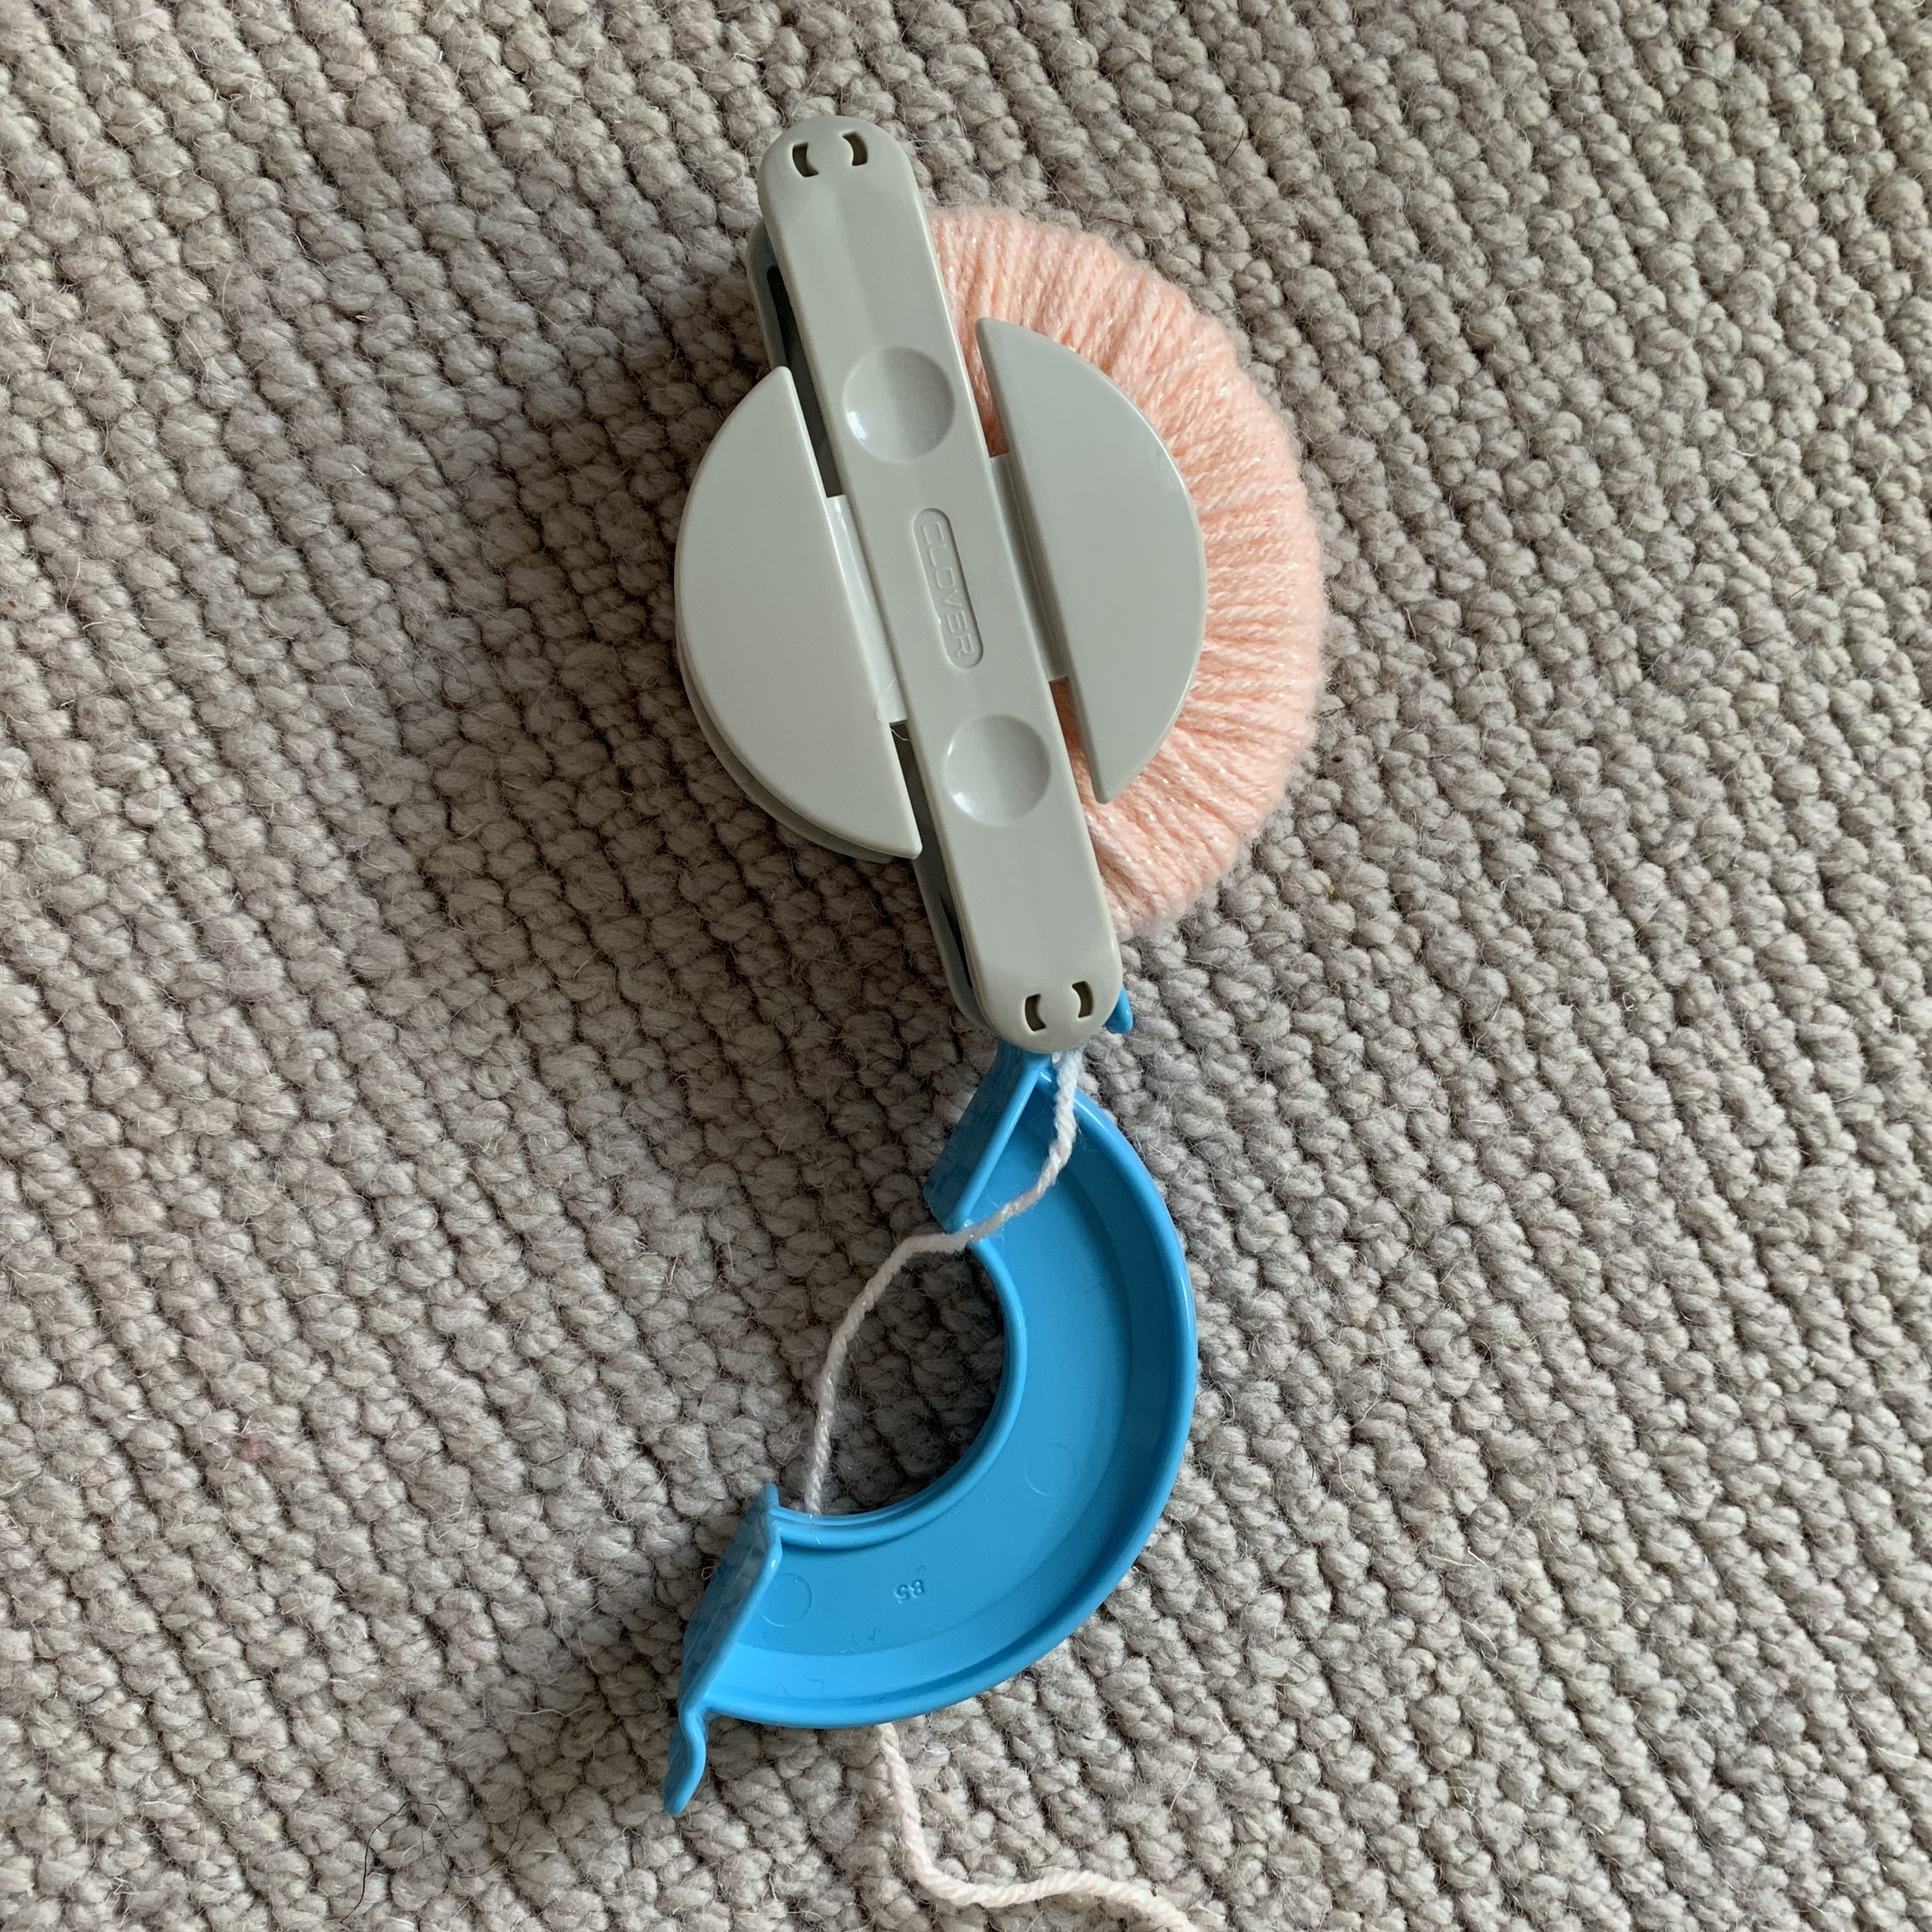
Step 1.
Open out your chosen Pom Pom maker and start wrapping the yarn around one side only. Keep wrapping until you’ve filled it out and covered all the plastic arms. The more yarn you use, the fluffier the Pom Pom will be so don’t afraid to fill it all the way up.
Step 2.
Once that side is full up take the yarn to the end, close the side you’ve been working on and start wrapping round the other side in the same way.
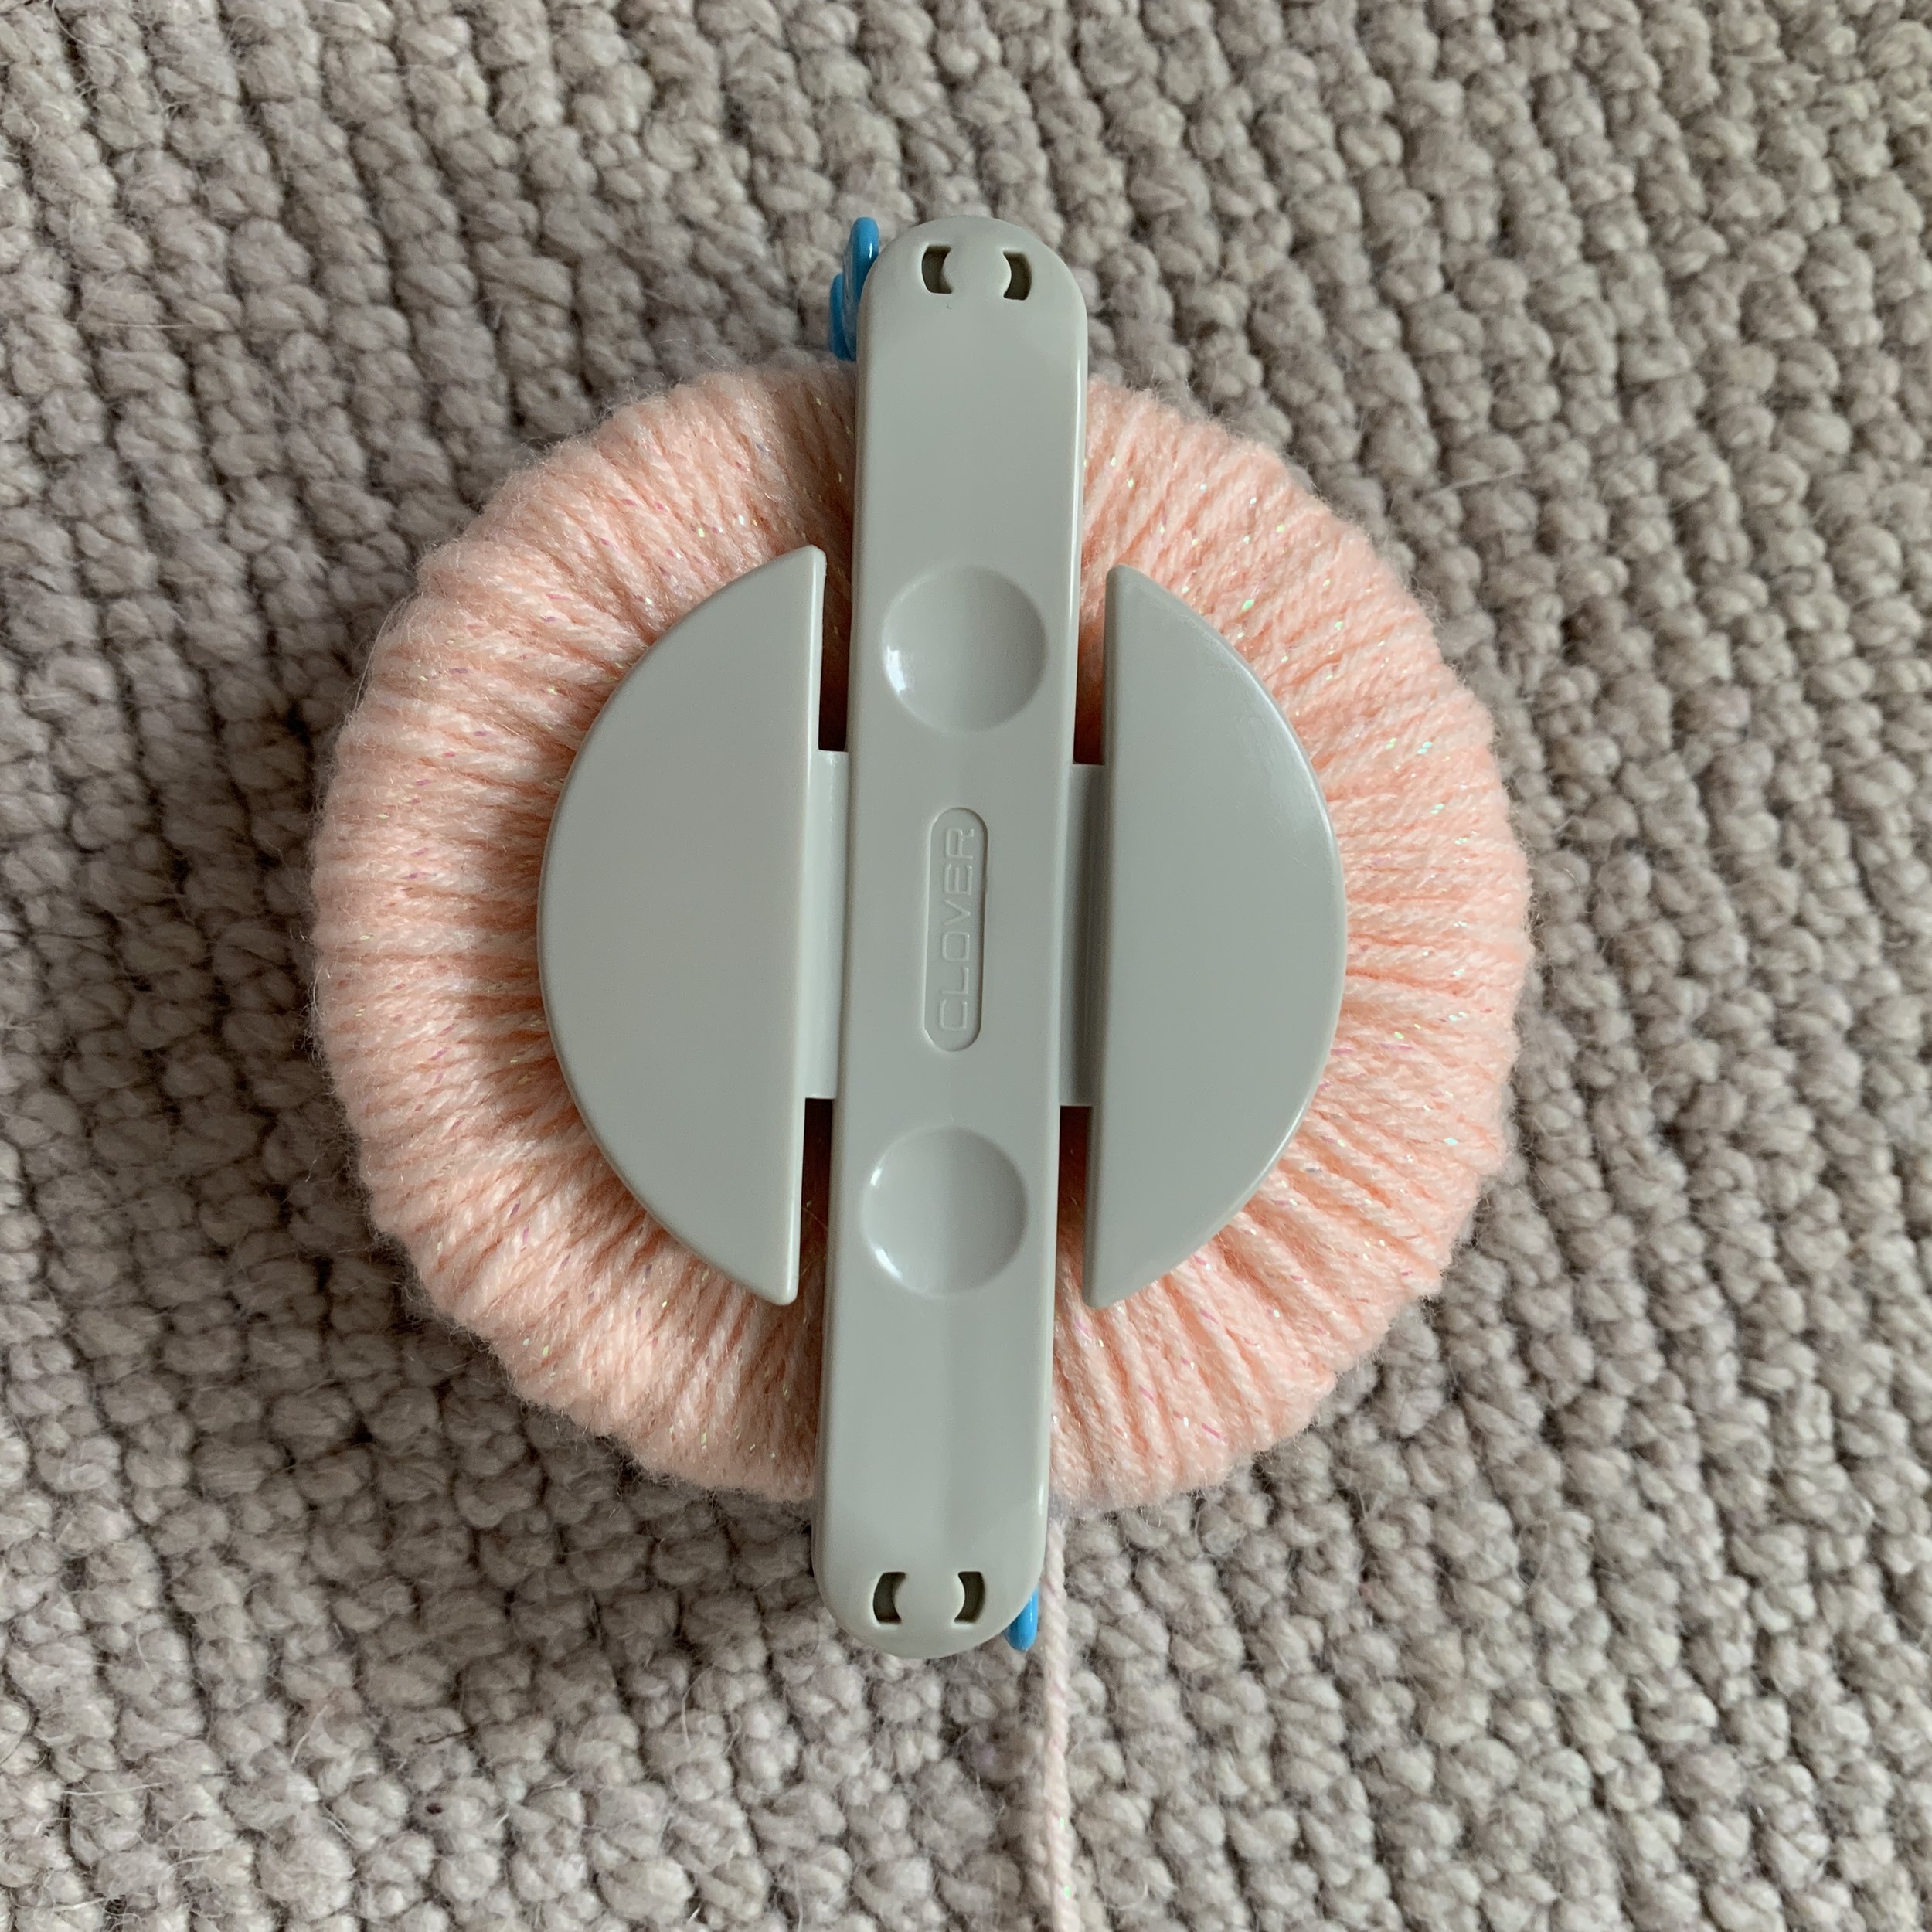
Step 3.
When both sides are wrapped close then both up. Then take your scissors and snip down the middle of each side.
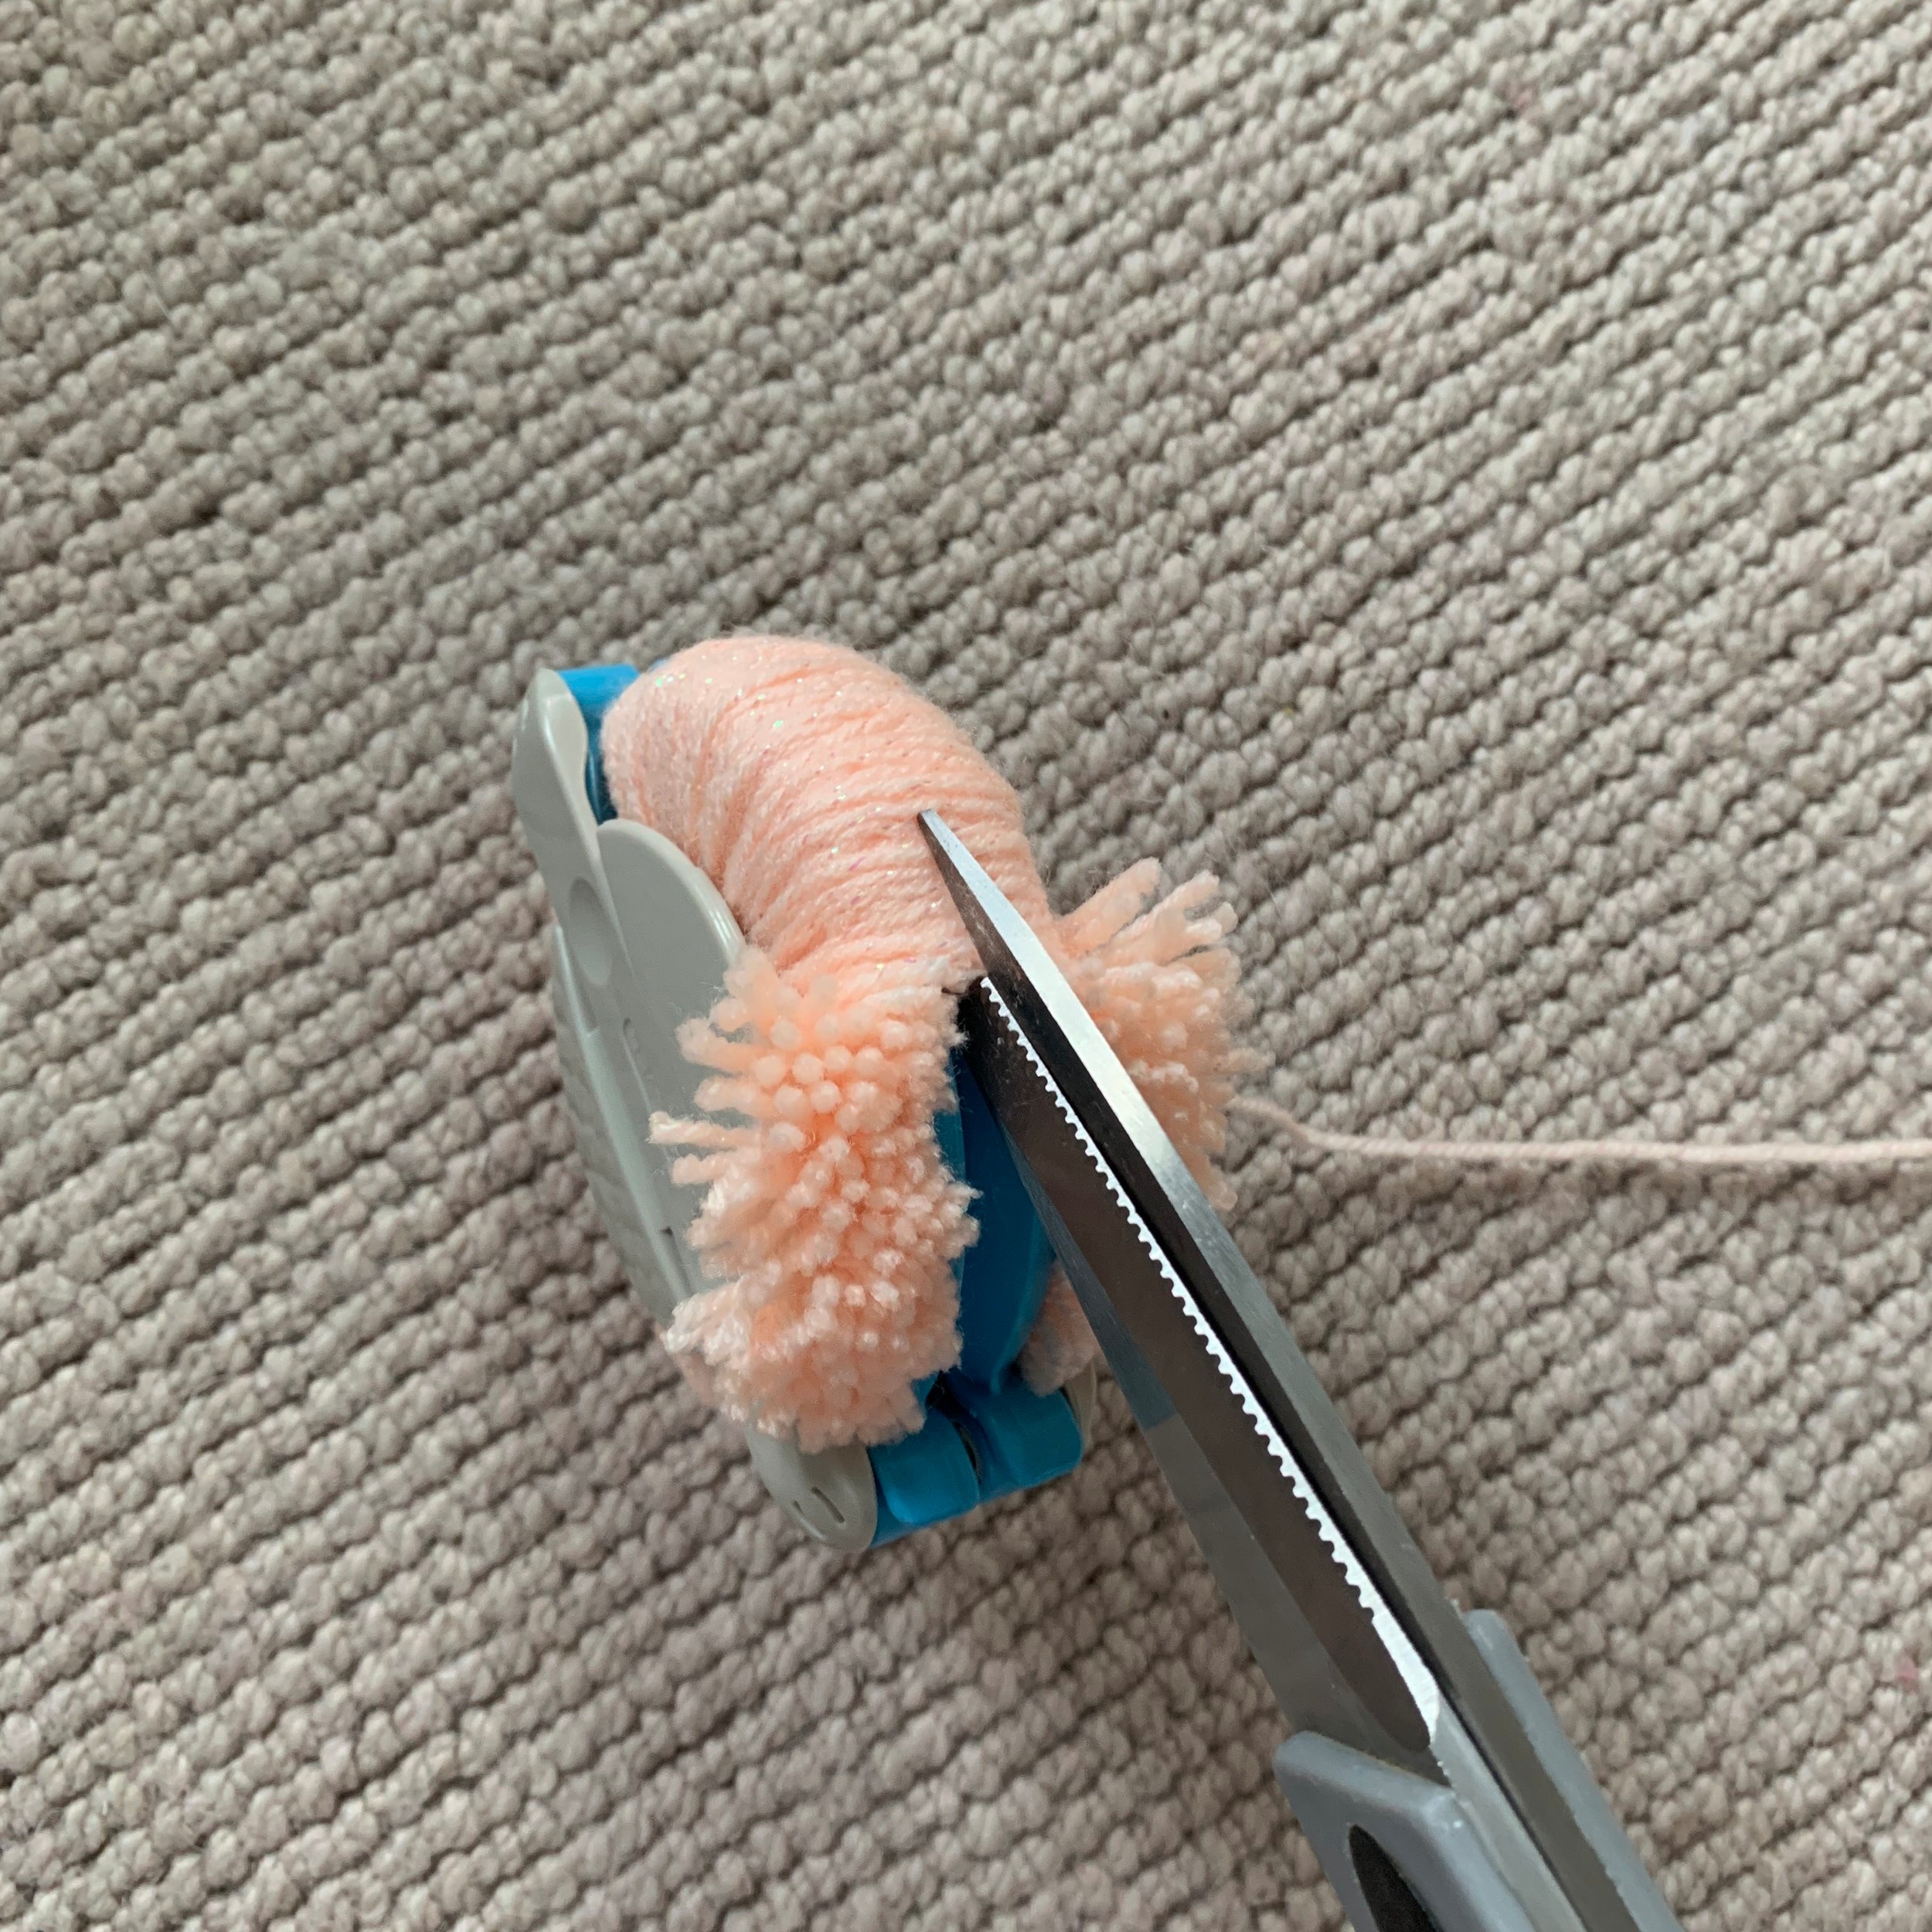
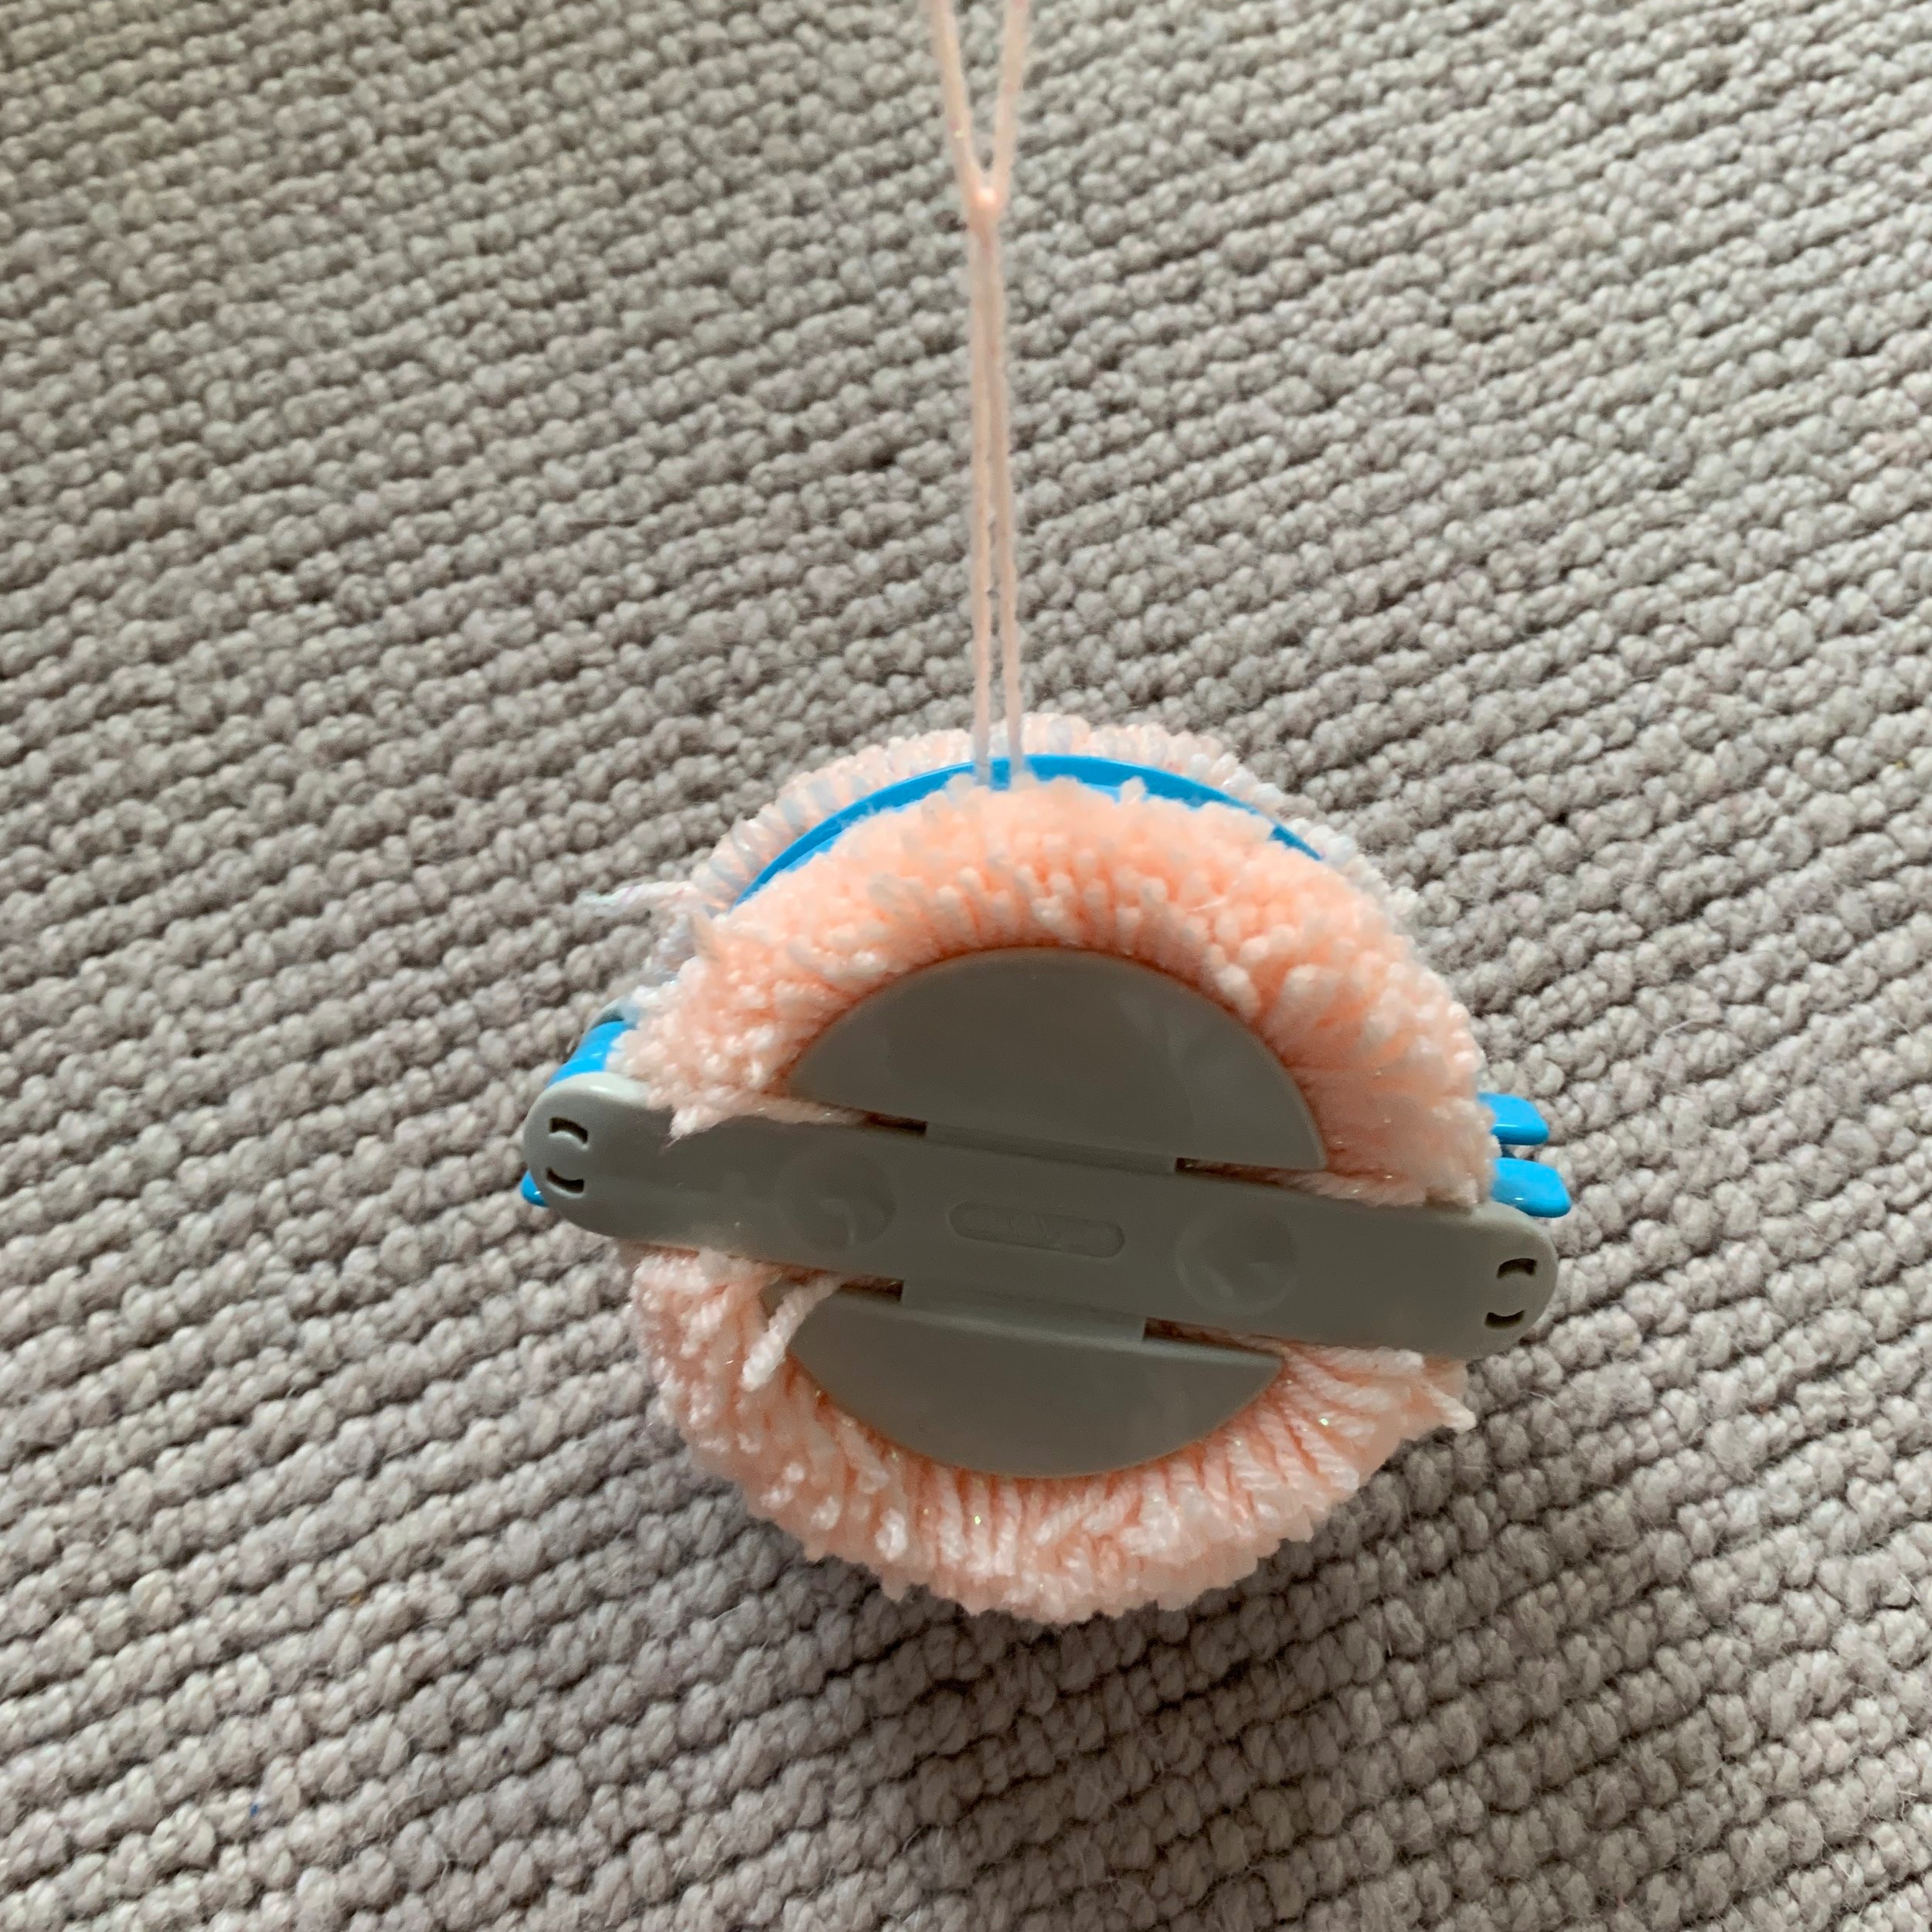
Step 4.
Take a piece of yarn in the same colour and tie it around the middle, between the two sides. Double knot it and don’t be afraid to do it tight so it doesn’t fall apart.
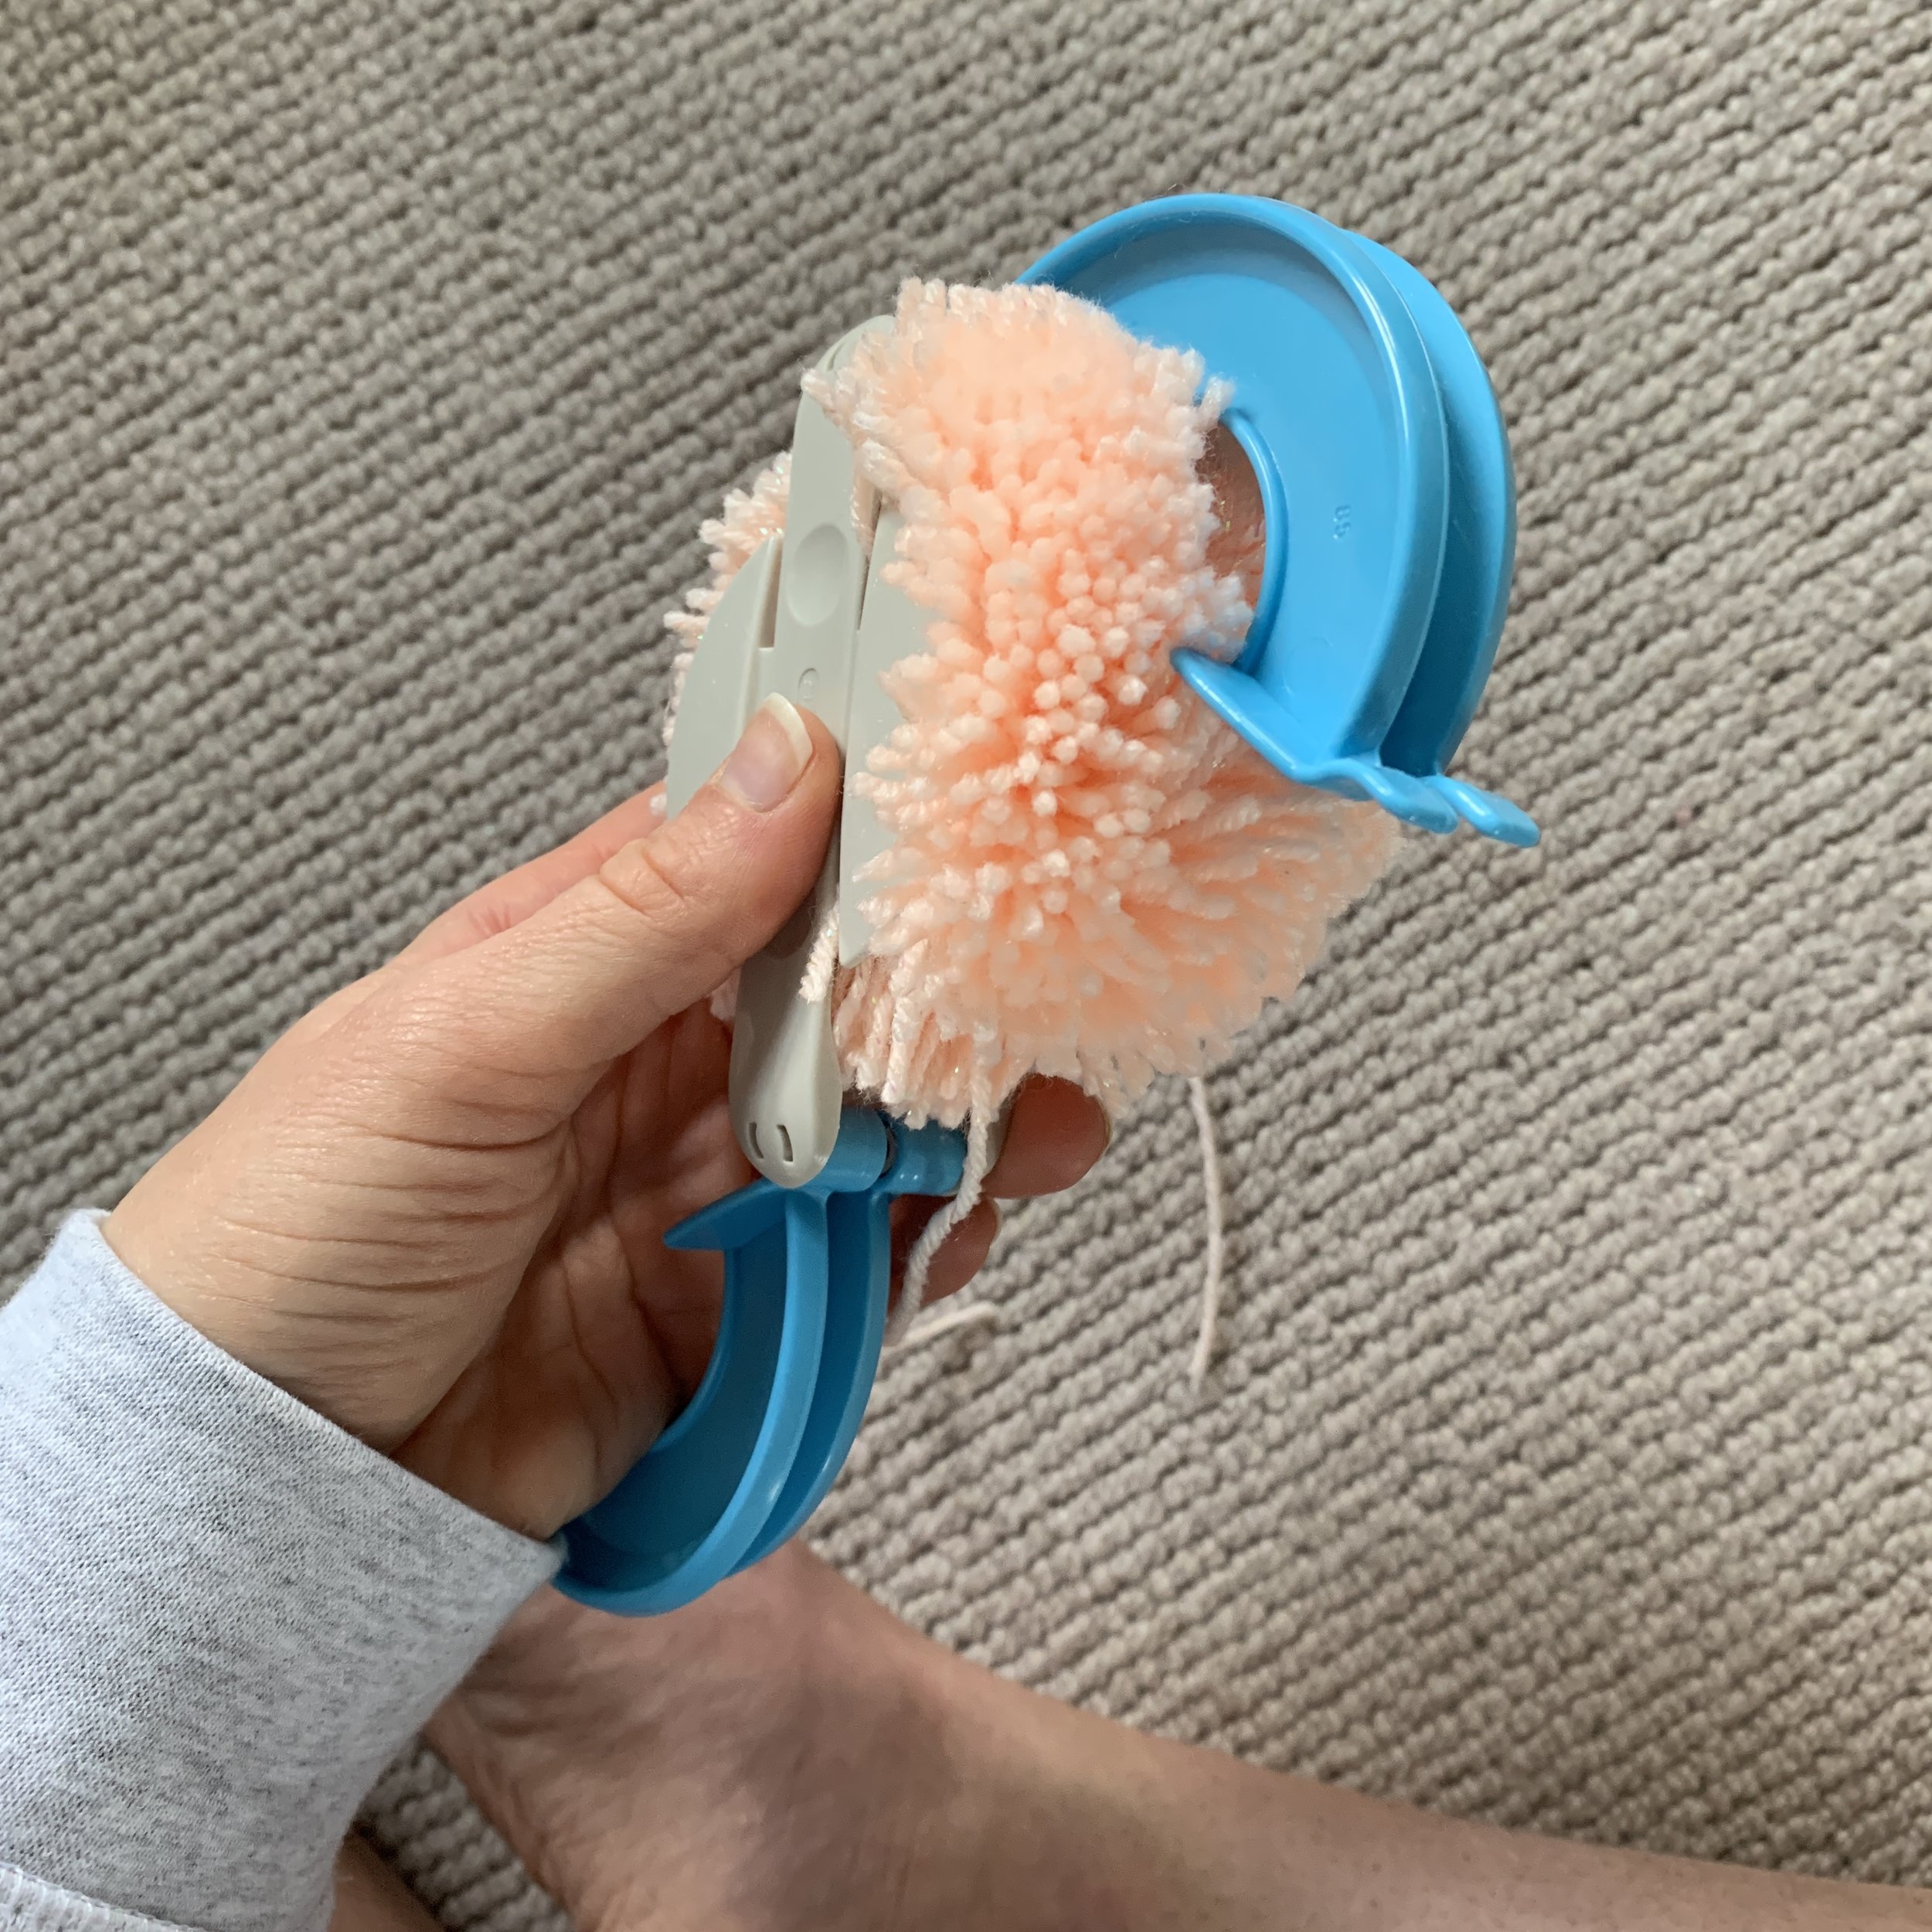
Step 5.
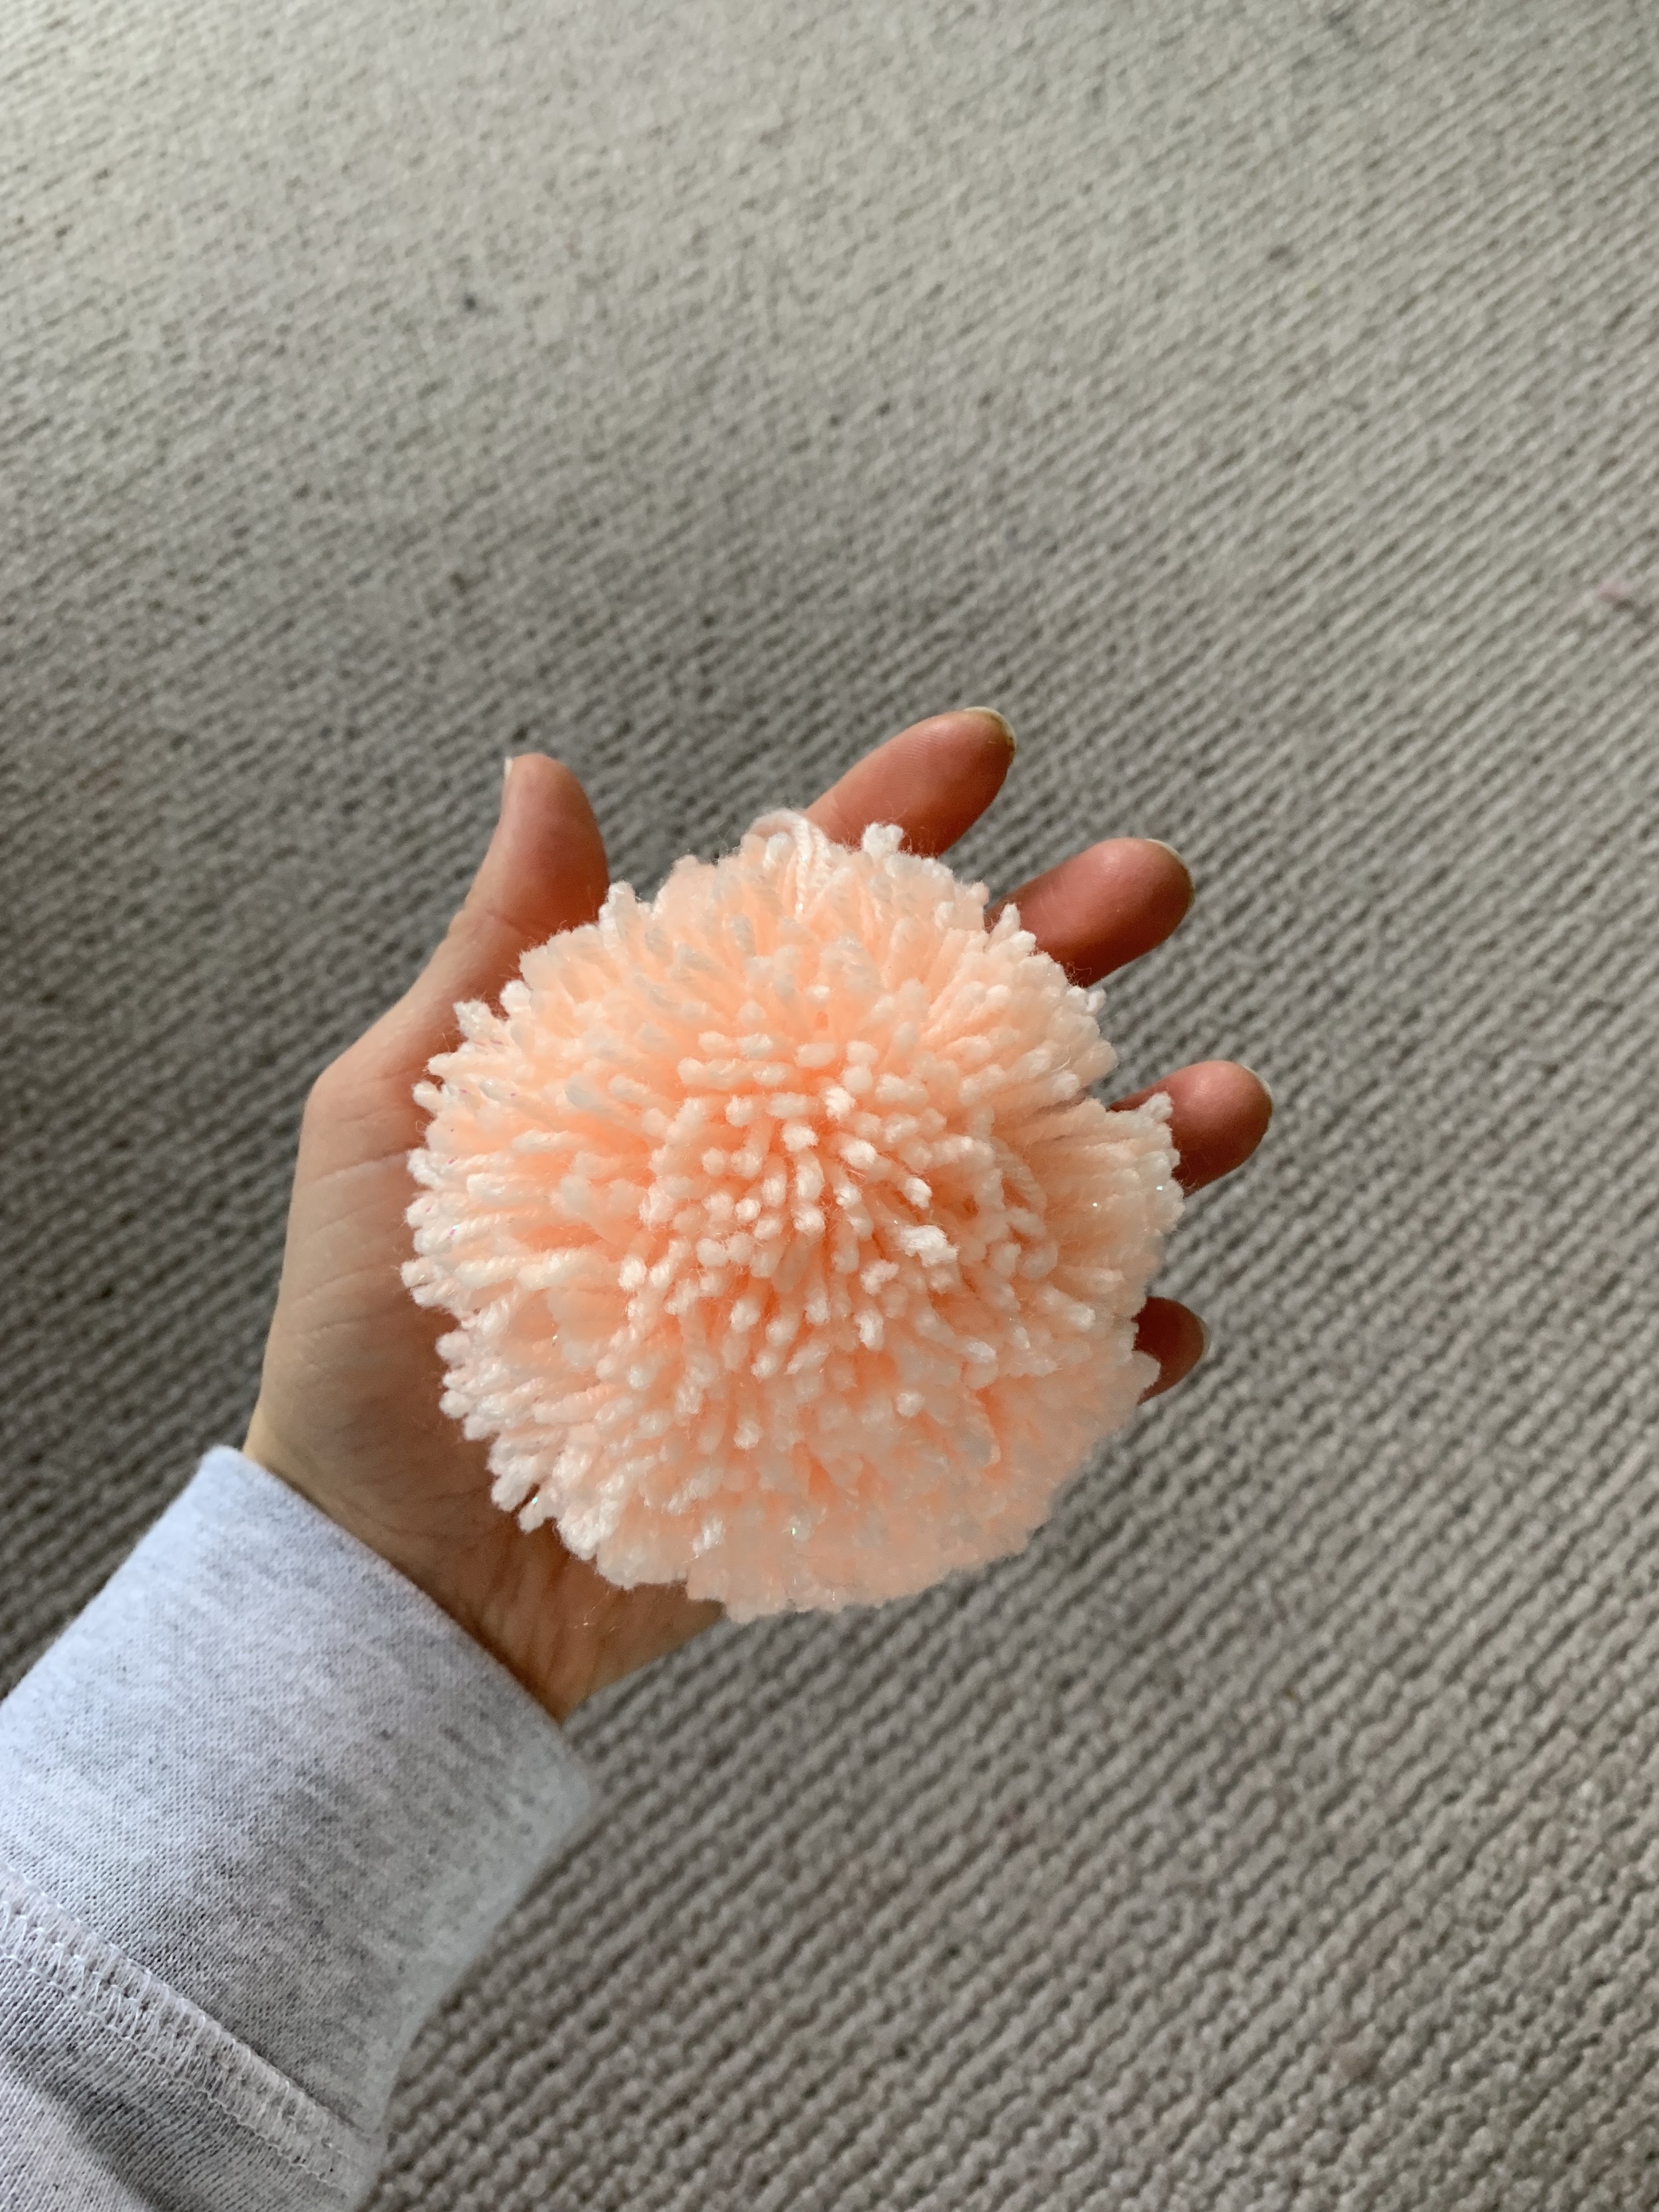
Once tied, open the clips on both sides gently and pull the Pom Pom maker apart in the middle. The Pom Pom will drop out and will just need any straggly ends trimming off. Fluff it up and you have your Pom Pom! Remember to keep the longer yarn for tying the Pom Pom onto the the hoop.
Step 6.
Make as many as you think you will need in various sizes. Then set them out roughly where you want them on the hoop before you attach them.

Step 7.
Tie the Pom Pom’s on to the hoop, trim the longer ends and use some additional yarn at the top of the hoop for extra decoration and to hang it.
And that’s it. One DIY Pom Pom Wreath! I told you it was easy!
Will you be having a go at making one yourself?

Jess x
This post is part of a paid partnership with Hobbycraft but all ideas and mad skillz my own.


